Having taken home the pre-bent (by James with a big hammer!) angle iron for the battery tray with me at the end of the last workshop session I spent an interesting evening at home getting back to grips with my stick welder. Buoyed by the success on my test piece of scrap I soon had the frame welded up and the cross-pieces in place.
I took the completed tray across to Wenhaston for James to check and we agreed it would be sensible to attach the legs at the workshop on a day with few other folk about. We met up a few days later and, with the tray in place, I tried to tack weld the legs to the tray. Unfortunately my welding still needs practice as they all fell off as we removed the tray from its tight surroundings.
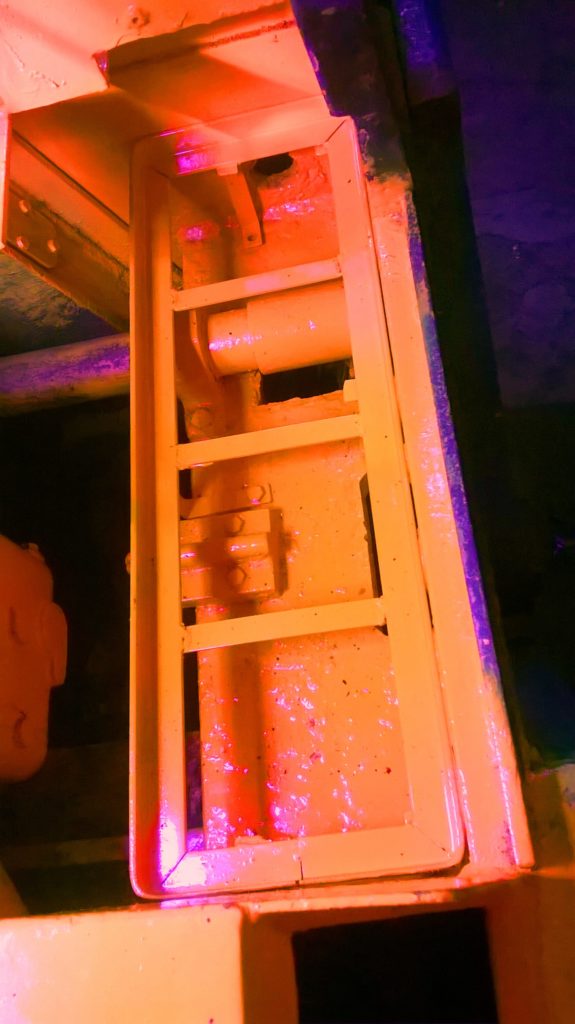
Unperturbed we marked the locations carefully, I clamped the legs in place and eventually had all 6 firmly attached. The completed unit was painted in the familiar heat-proof yellow paint before leaving it to dry. We arrived this Saturday to find that James had been busy and, after a little grinding to ease the fit of the tray, reported that all had gone well with the fixing holes lining up, a great relief! It looks good with the battery in place too.
After the usual tea (coffee) and biscuits, we settled down to work.
Bob (lying down on the job again) struggled with, but eventually succeeded in fitting the newly-manufactured right hand side sander tube whilst Toby, James and I finished the disassembly of the steam locomotive frames ready for more drilling and other metalwork, whilst Ken continued his thorough overhaul of the Deutz engine.
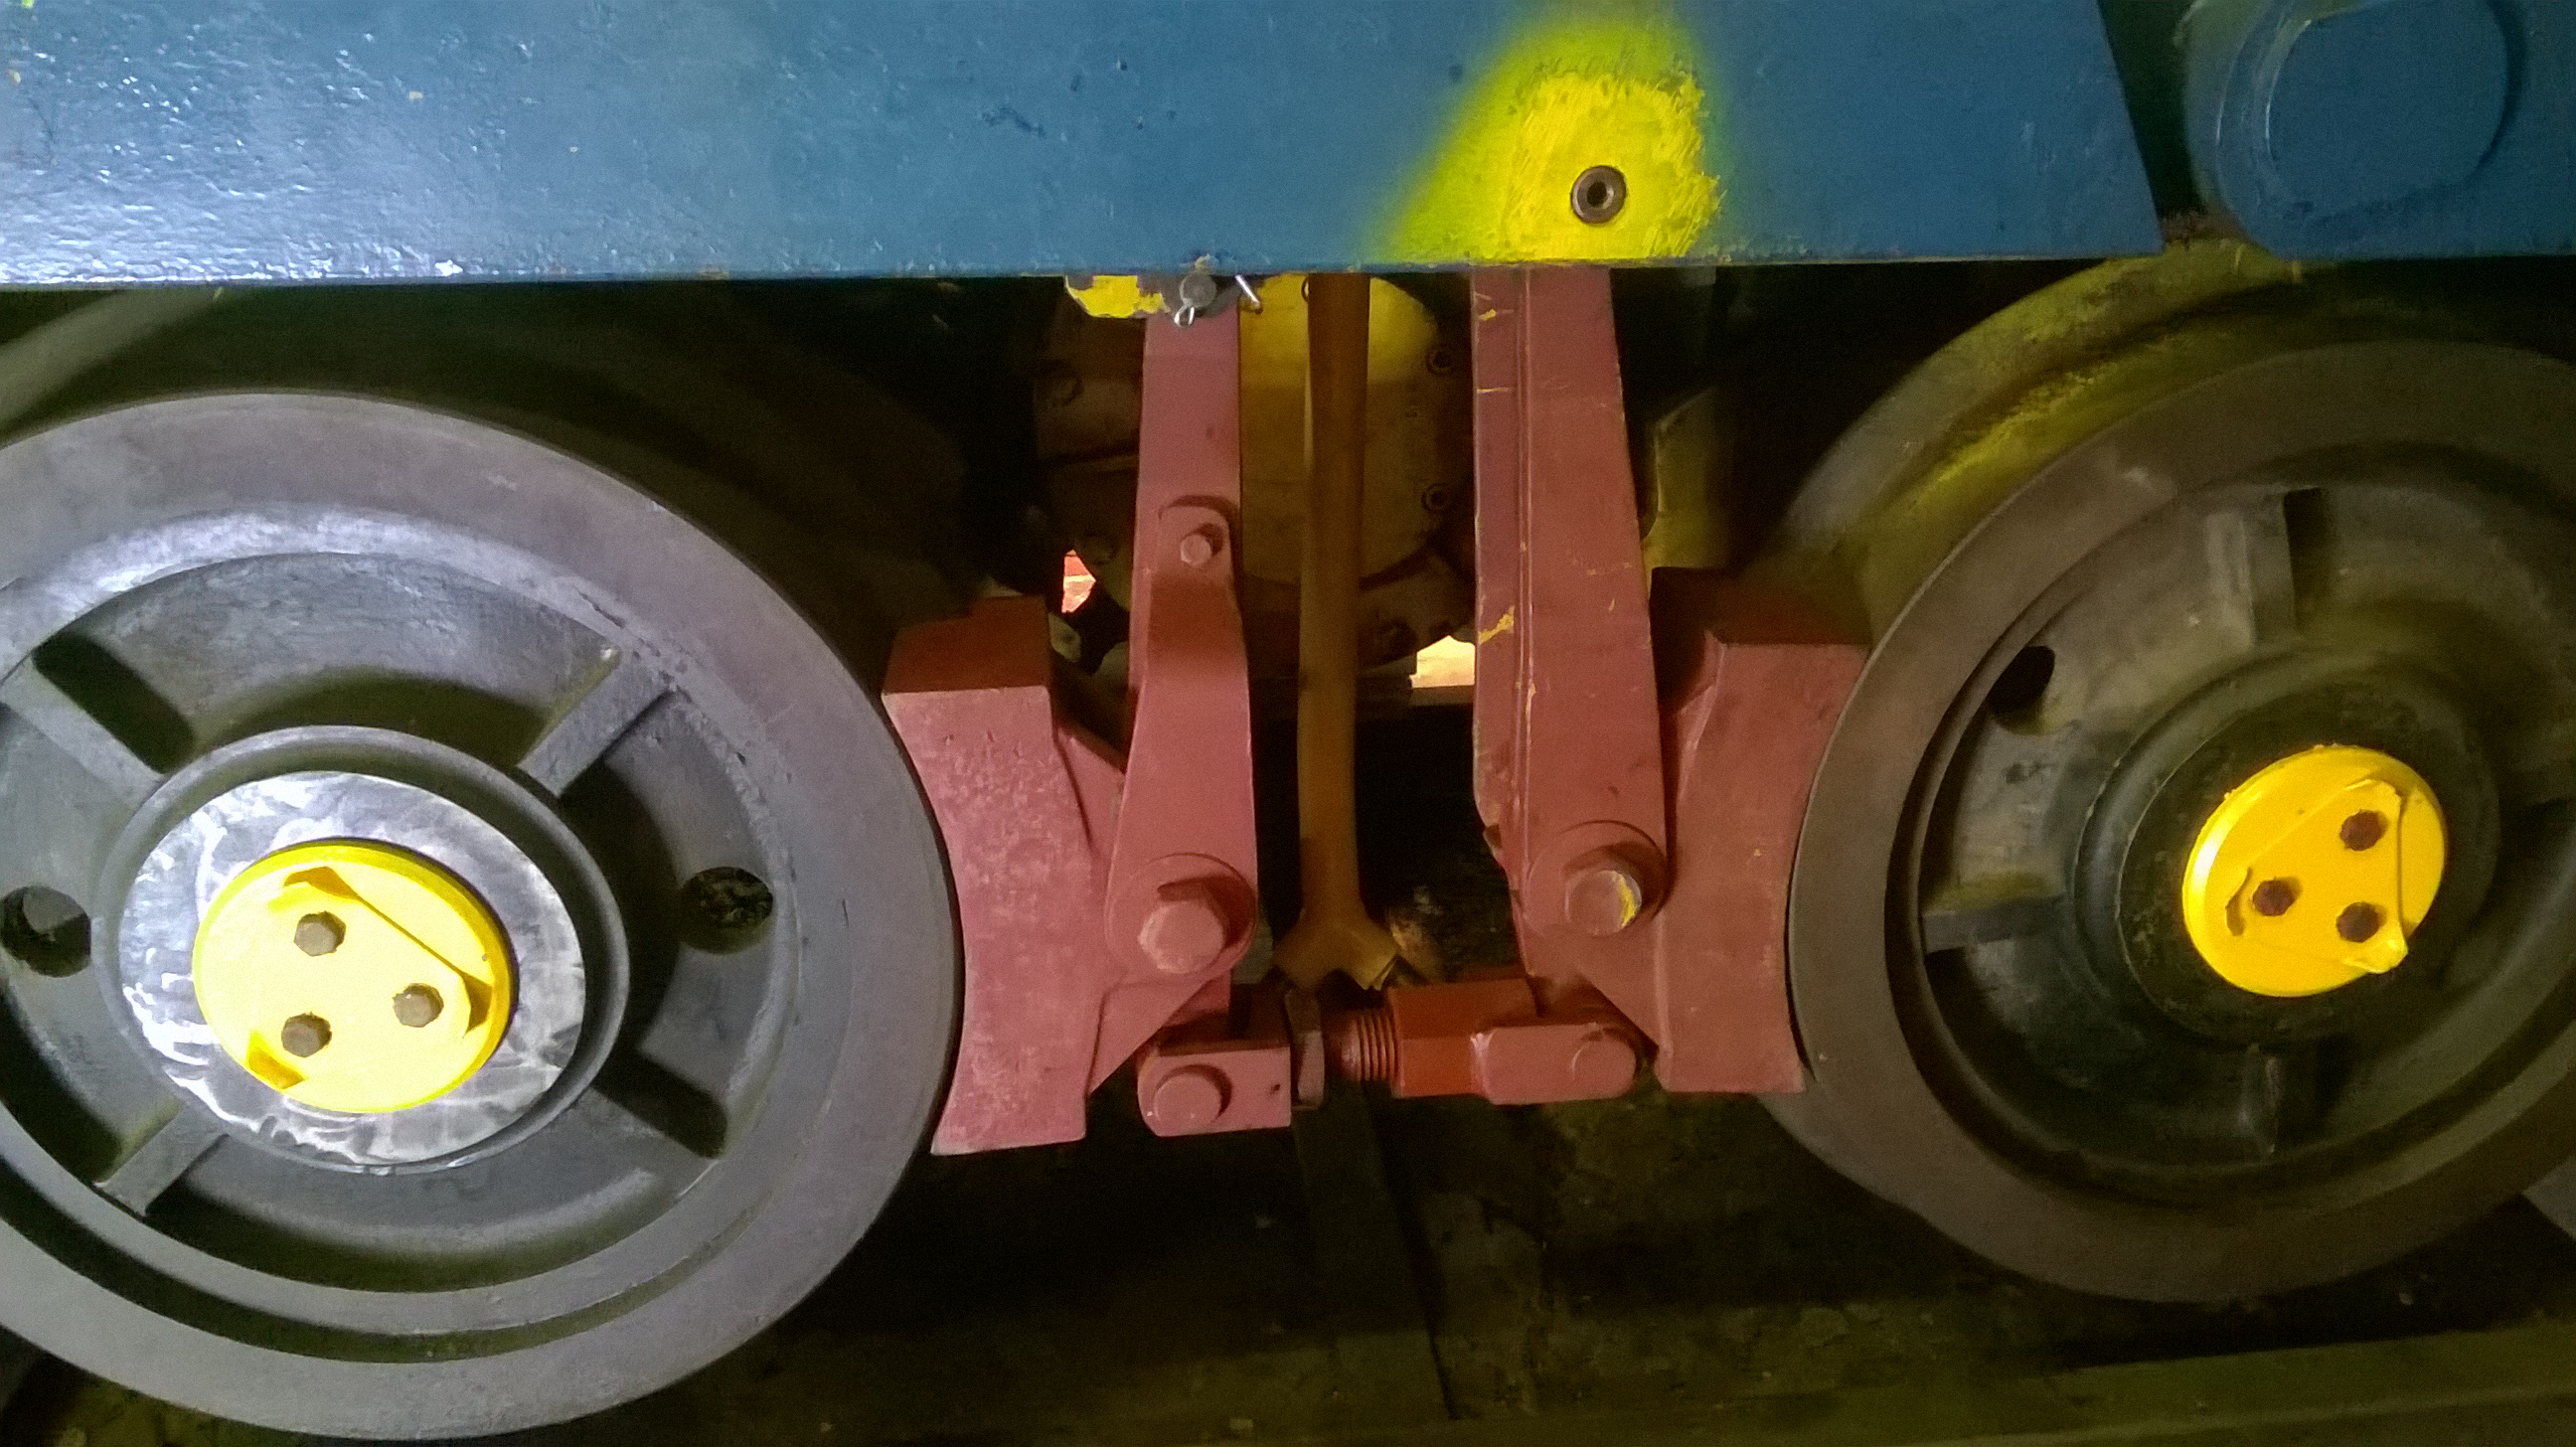
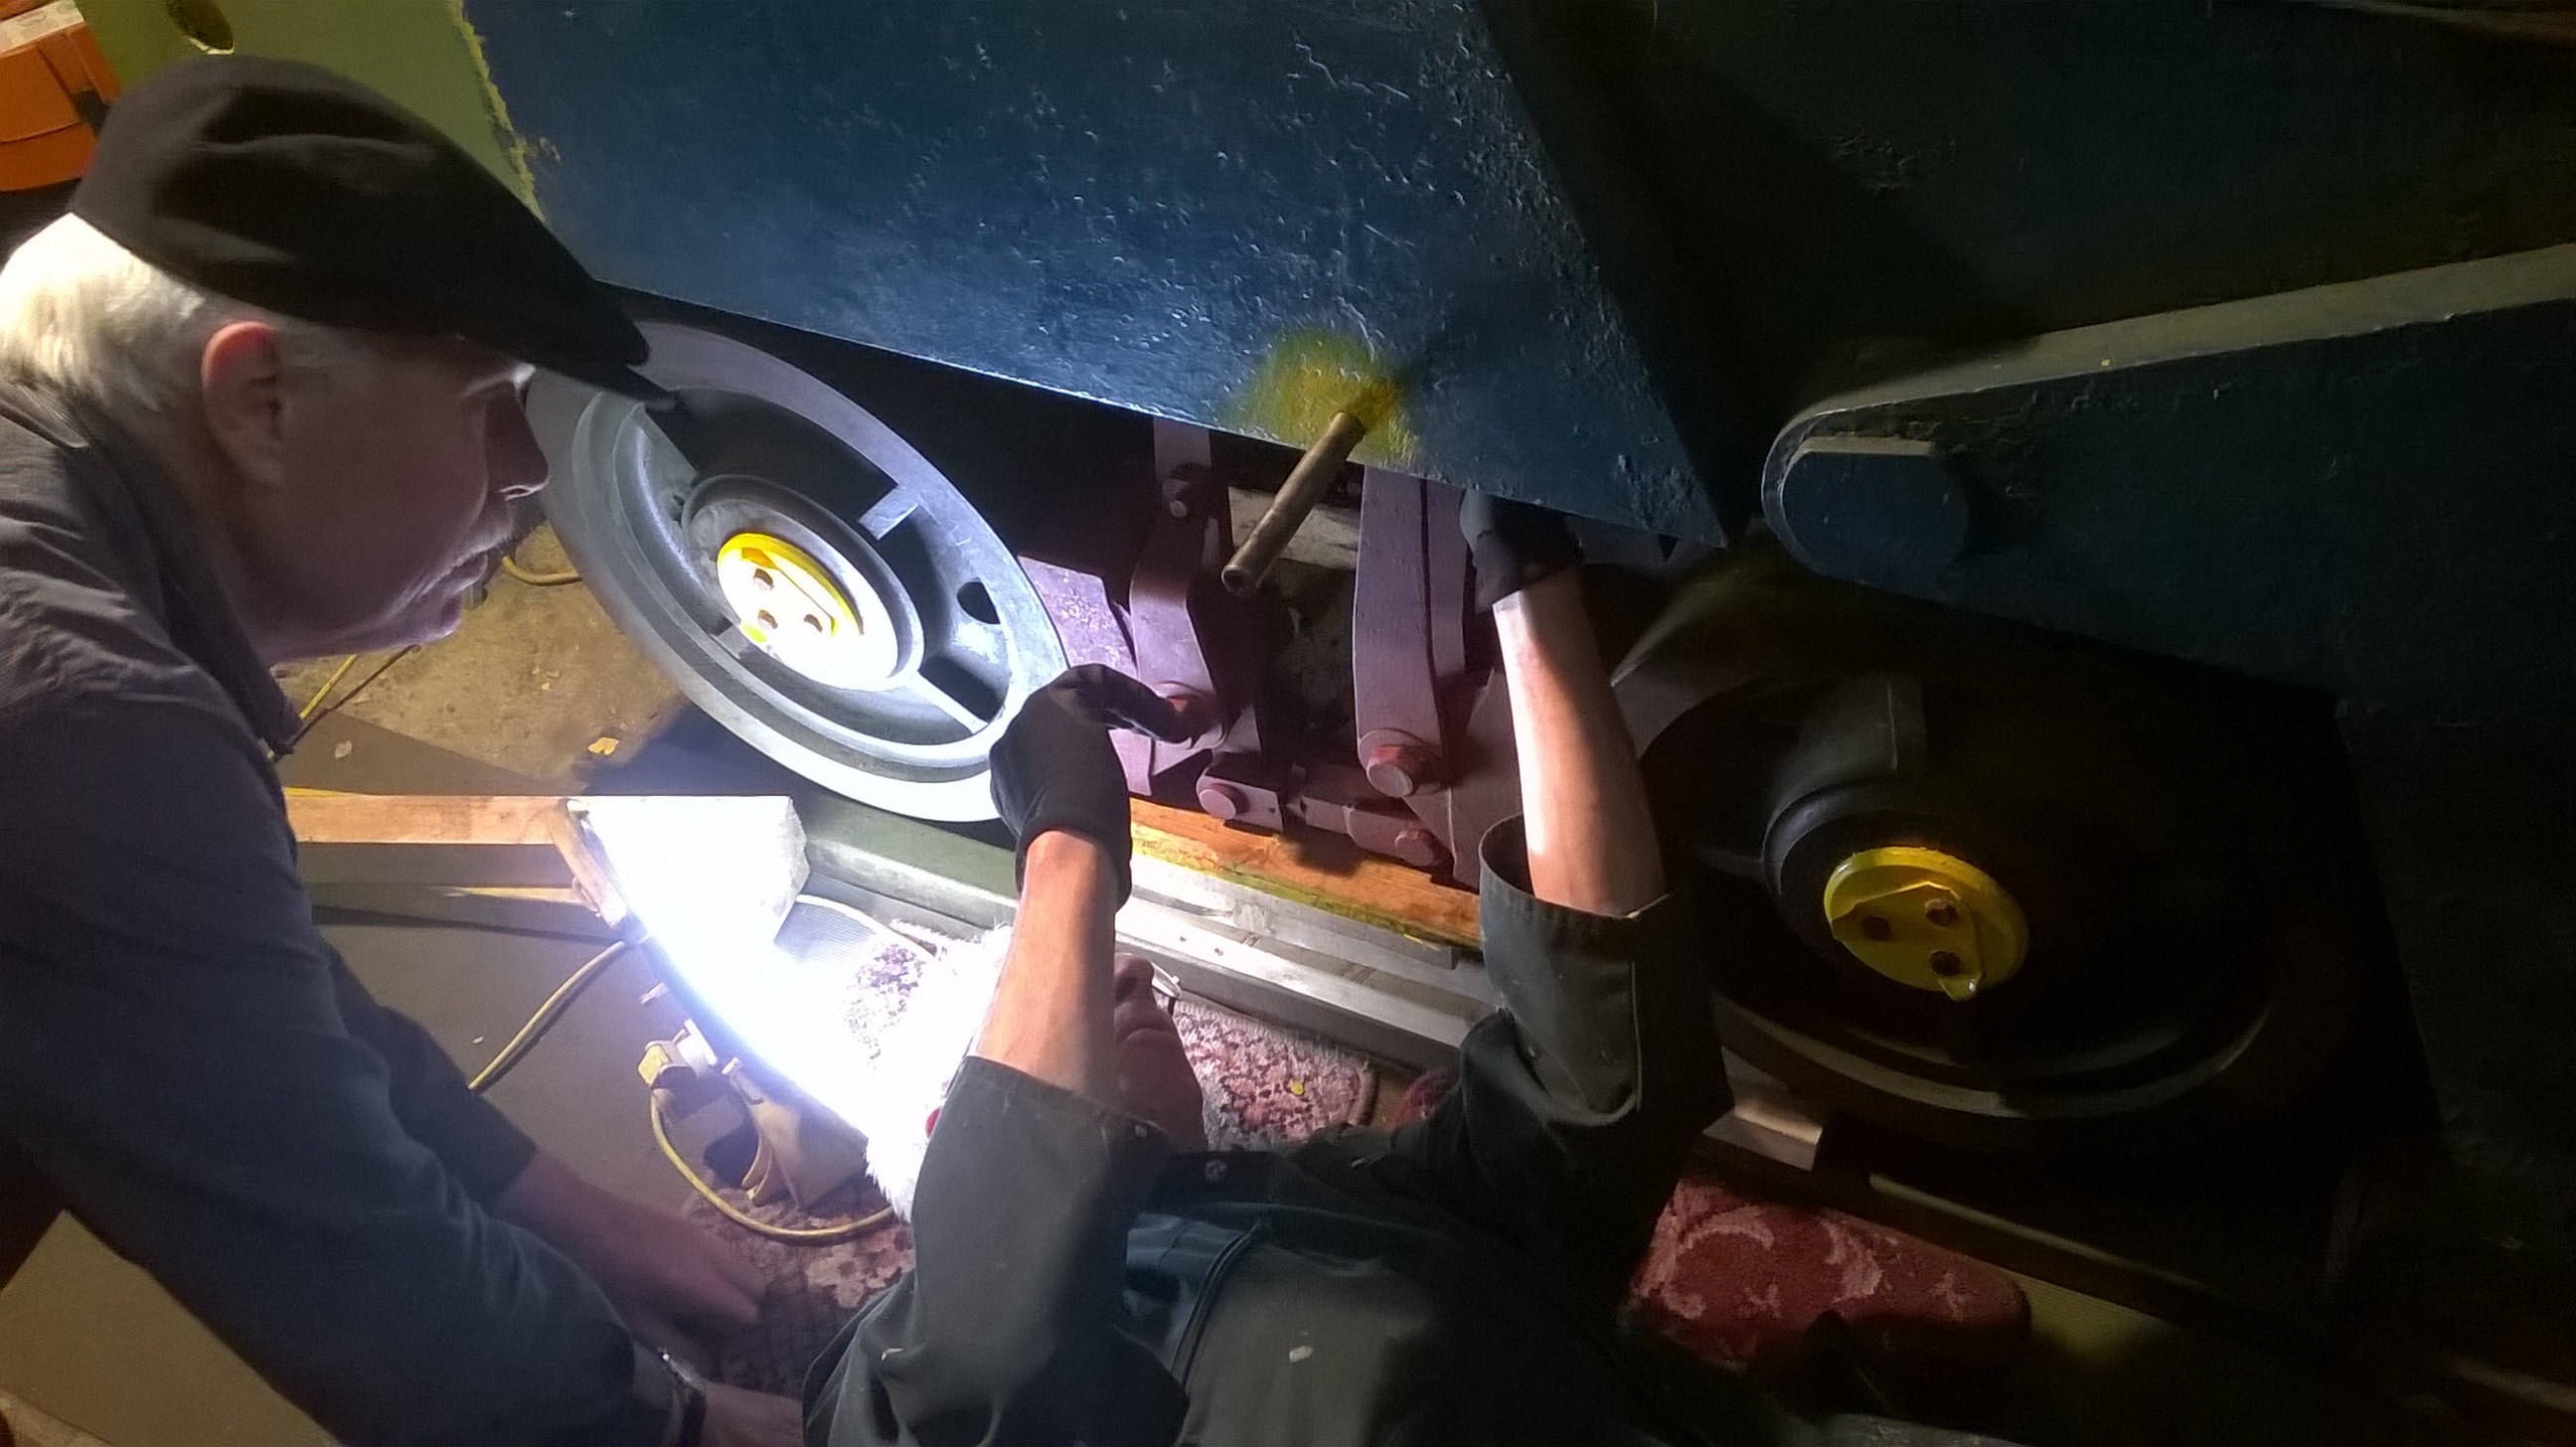
After more tea (and coffee), biscuits and chat we returned to the workshop to start refitting the brakes (I really must get some photos of Bob working on his feet!). The first side took a lot of fettling to make it fit and to get it adjusted but was eventually in place and working nicely. Having learned from the first side, we then spent quite a bit of time easing holes that had been restricted by paint and slightly loosening bolts to ensure the second set of brakes would be a far easier fit.
We had been having so much fun that time was getting on so we decided to call it a day and have a tidy up, leaving the RHS brake fitting to another day.