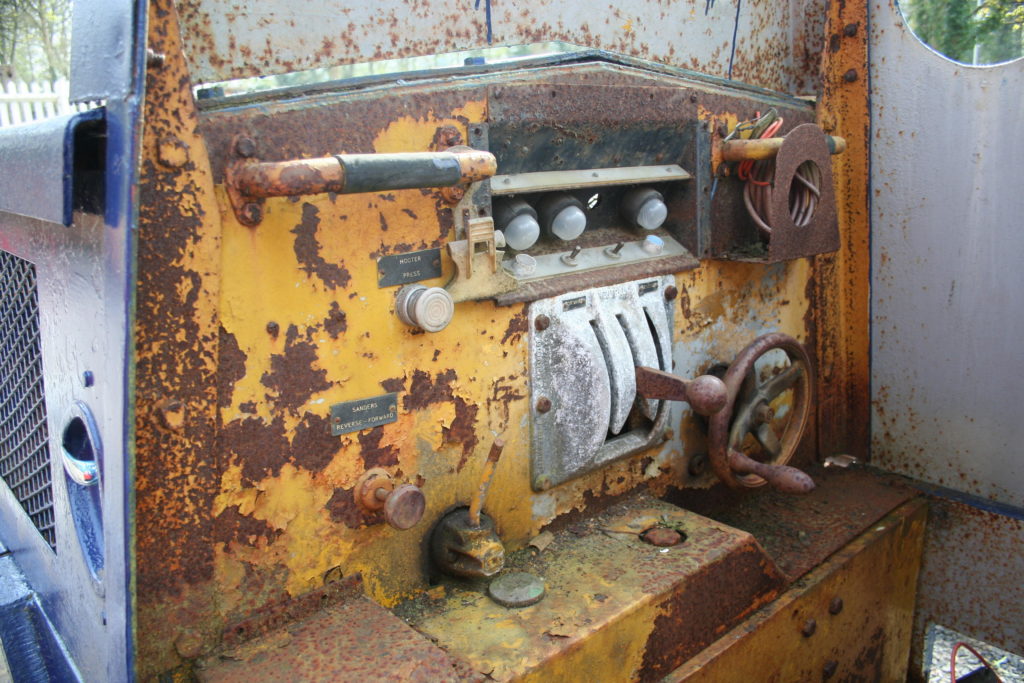
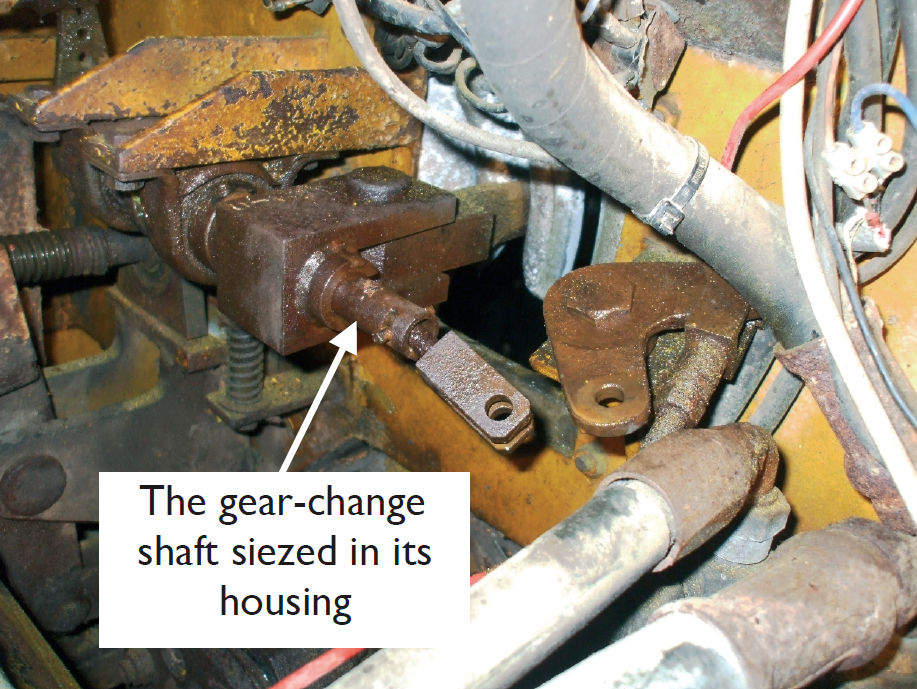
A cold, grey, drizzly day (one a Scot would probably describe as dreich) had me heading across to the workshop with more hope than anything else that the control unit I’d left swimming in penetrating oil may be free.
The working day started, as usual, with tea (obviously coffee for me) and some lovely home-made flapjacks (thanks Kate). We were soon making our way into the workshop, leaving Toby to do some final varnishing of the tram carriage. I headed to the vice, stopping for a lump hammer and a piece of sacrificial wood on the way. A few sharp taps revealed no movement, very disappointing. After a great deal of discussion and head scratching we decided that heat was needed so turned our attention to other jobs on the loco whilst John went shopping.
The cladding on the exhaust had been removed since I last visited the workshop so our first “on loco” task was to remove the (just about) flexible pipe between the manifold and the front bulkhead. Bob set about this and the bulk was soon removed leaving a small stub push fitted into the front bracket, another small section soon gave way but the final few loops were very much wedged / rusted in – pad saw needed – something else for John’s shopping list.
Next on the removal list was the alternator. Bob soon had the bolts loosened and we dutifully photographed and wrote down the wiring details as we carefully removed each connector. With the alternator removed we turned our attention to the air filter. The lower oil bath was finally removed (goodness knows how we are going to be able to check this regularly when the loco is working!) revealing a bright, clean wire mesh filter and fresh looking oil. The upper section is mounted on a large plate affixed to the front of the engine casting, these were removed, then the whole thing was rotated until it was upside down in order to detach it from the inlet manifold.
Out came the wire brushes, vacuum cleaner, engine degreasing spray and rags, soon after yellow paint slowly emerged from a grey / black layer of muck. John arrived back from the shops so I got the pad saw working on the remains of the flexible exhaust. With a weakening slot cut it was out with a cold chisel and lump hammer (I seem to need one of these at some point on most jobs) to slowly remove (destroy) the final section of exhaust pipe.
Turning our attention back to the control mechanism, John soon had the gas torch playing over the outer tube, occasionally having a flare up as the penetrating oil and grease burned off. After a while it was time for the lump hammer and piece of wood again and eventually we found the “moveable” section had gone further into the mechanism by about 10mm. Unfortunately it seemed stuck in a different place rather than being as free as we had hoped. More grease and penetrating oil and more head scratching had me working on a spare long bolt, grinding the threaded section down so that it fitted into the slot of the “movable” inner section.
With a mix of relief, joy and a bit of confusion, the middle section finally gave way and the unit was at last separated. The fit between the elements is incredibly tight. Even after John cleaned up the outer tube and I cleaned up the inner rod we still had an interference fit, particularly if the alignment is a few degrees out. Both parts were left with a light layer of grease until the inner section can be polished further next time. We think a clearance fit will be easier to use, easier to lubricate and therefore easier to maintain!
Whilst John and I had been sorting the controls Bob had been busy applying an undercoat to the inside of the cab and generally starting to tidy up. It was 4:30 before we said our good byes and headed off into the dusk. Another satisfying day!